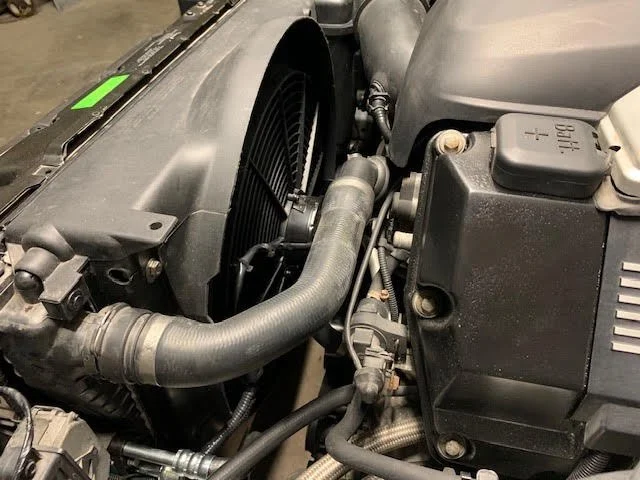
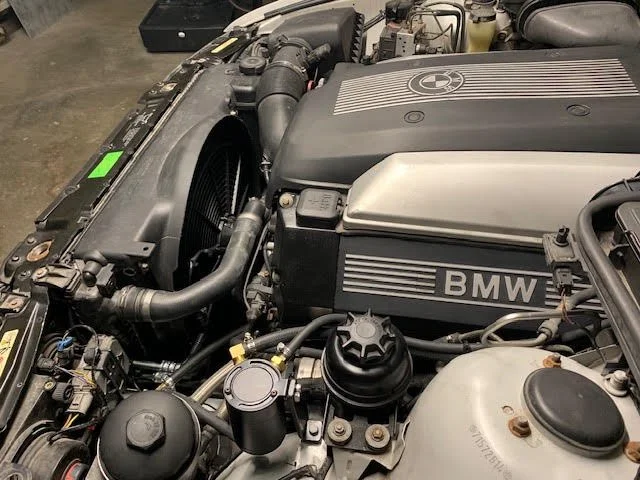
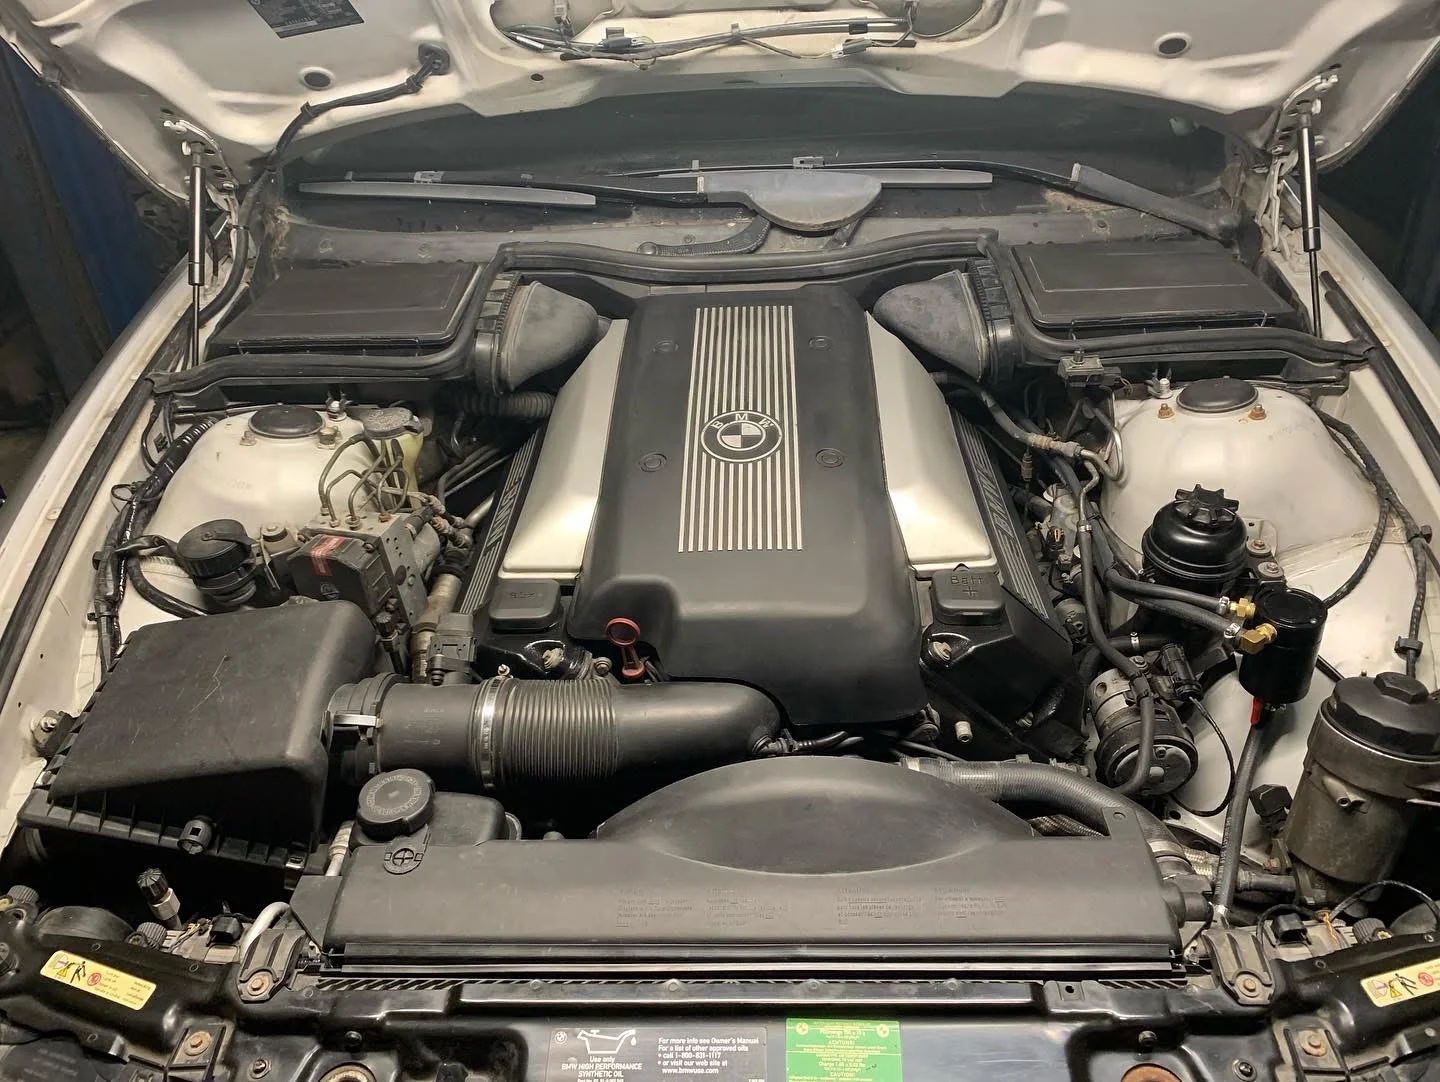
540i Fan Kit
Installation procedure
Thank you for purchasing the 540i fan kit! Now let’s get down to the installation!
Remove factory air filter box, along with factory air intake tube and place to the side (pic 1).
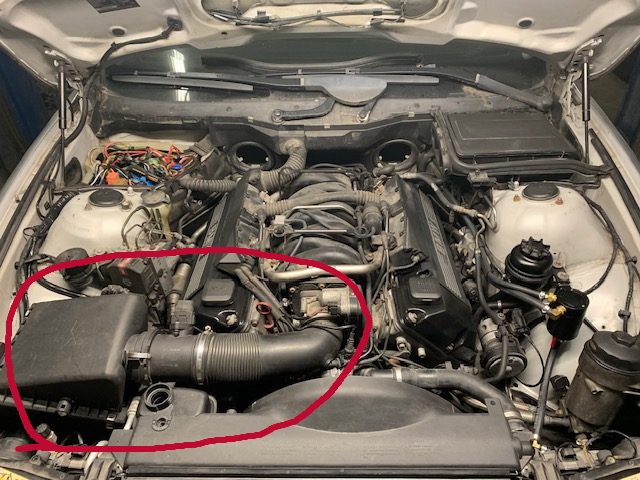
pic 1
2. . Drain coolant to facilitate removal of the coolant expansion tank.
3. . Remove coolant expansion tank and place to the side. Remember to disconnect the sensor on the bottom of it.
4. . Remove factory mechanical fan. This requires a special tool to hold the water pump pulley from turning while breaking the fan clutch nut loose. Remember: the fan clutch nut is reverse thread (pics 2 and 3).
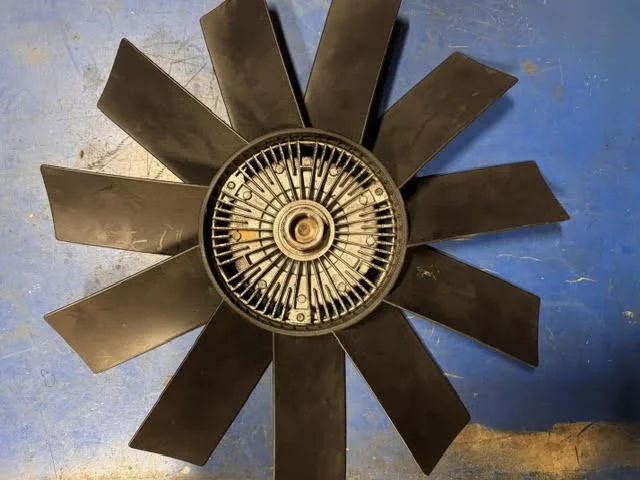
pic 2
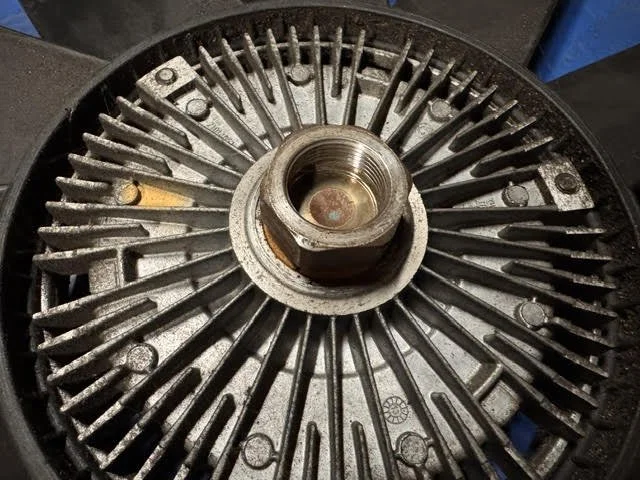
pic 3
5. . Remove factory fan shroud.
6. . Disconnect lower radiator hose coolant sensor.
7. . Remove lower radiator hose.
8. . Lower radiator hose modifications for hose sensor adapter.
a. The hose adapter is going to be in the lower radiator hose, in the area above the 90 degree bend (pic 4). Make sure the hose is clean before proceeding to the next step.
b. Mark 3 lines on the top of the hose (top refers to the upward facing surface of the hose when it is finally installed on the engine). About 2 inches up from the 90 degree bend, mark off two lines 11/4” apart to mark the area being removed. (Pic 5)
c. draw a line through them (as shown in pic 5) approximately 2 ½ inches long. This line is important so orientation of the top and bottom sections of hose stay the same after it’s cut.
d. Cut the 1 ¼ section from the hose.
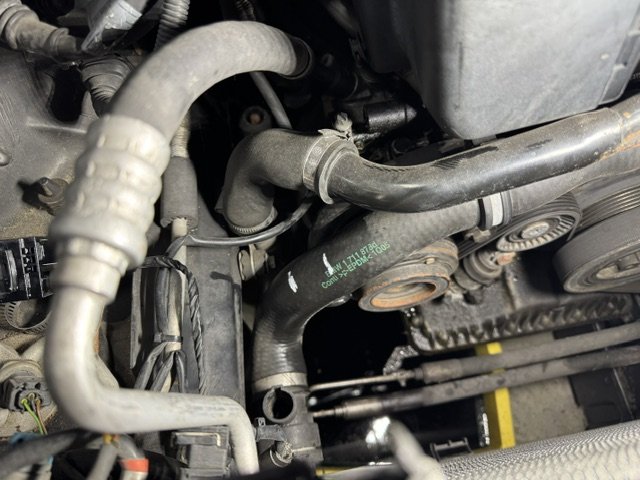
pic 4
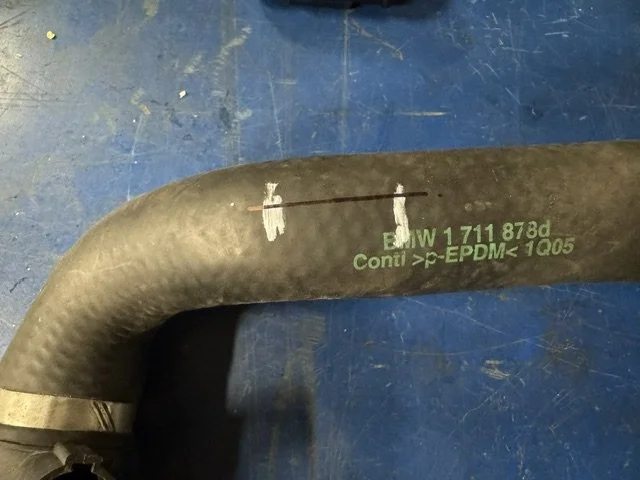
pic 5
9.. Slide a hose clamp onto each half of the cut hose with the screw tightened to the front and facing up. This ensures easy access to clamp operation in the future after the hose has been installed.
10.. Put the black aluminum hose sensor adapter on each piece of cut hose, making sure to align the line you drew along the top face of the hose. The sensor adapter is a tight fit. A little Kroil Oil or similar spray lubricant can aid in getting the hose pieces onto the adapter if needed.
11.. Tighten the hose clamps.
12.. Install the temperature sensor in the hose adapter. (Pipe sealant or teflon tape is recommended on the threads.)
13.. Reinstall the hose back onto the engine and radiator. Reconnect the factory temperature sensor in the lower radiator hose.
14.. Slide the new preassembled electric fan and shroud into place on the radiator. It is a close fit, with how it slides into place on the radiator and how it sits with the water pump once installed. (Make sure to route the small top coolant hose back through the engine facing top slot on the new shroud so it can be reinstalled onto the expansion tank. A spring clothes pin or small spring clamp can be helpful to keep it through the slot until the expansion tank is back on the car.)
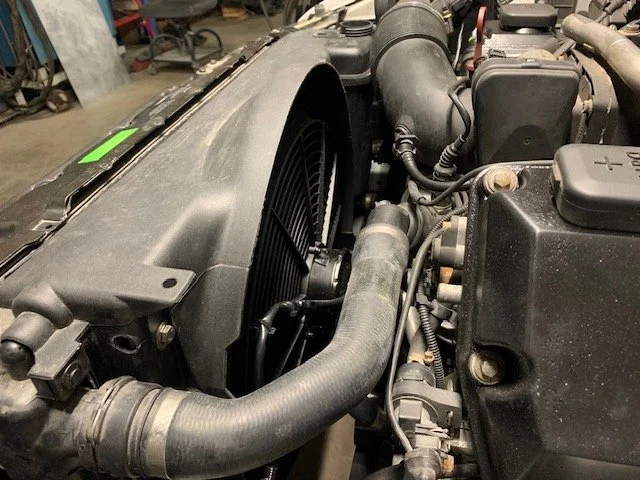
pic 6
15..Reinstall the expansion tank, making sure to reconnect the sensor in the bottom of it. Reinstall the small top radiator coolant hose (from step 14) onto the expansion tank and tighten the clamp.
16..Lay the wiring harness out in the engine compartment, connecting the two pin weatherpack connector to the fan connector, the single female spade connector onto the temperature sensor in the hose adapter, and the small ring terminal secured under the ground screw on the hose adapter. The other end of the wiring harness will end in the passenger side ECU box under the passenger side cabin air filter. Route the harness close to the rear of the passenger side headlight and up the passenger side of the engine compartment atop the existing factory wiring harness. (Pic 7a)
17..Connect the medium size ring terminal to the ground stud on the passenger side of the engine compartment (pic 7b)
18..Remove the passenger side cabin fresh air box.
19..Remove the ECU Box cover.
20..Route the fan wires through the factory wiring harness conduit the factory harness utilizes to bring the factory wiring harness in the ECU Box. (Pic 8)
21..Wire the relay in the ECU Box as the pin out diagram shows.
The red wire on the relay harness is 87 (red). It gets connected to the big red wire by splicing in at the rear of the ECU Box (pic 9).
The black wire on the relay harness is 85. It gets connected to the green with white stripe wire circled in red here (pic 10).
The white wire on the relay harness is 86. Connect this to the white from the fan kit harness (temp sensor). The blue wire on the relay harness is 30. Connect this to the red wire on the fan kit harness (fan power).
22..There should be suitable space in the ECU Box to tuck the relay safely into a spot where it will not interfere with any other wiring (pic 11).
The mounting bracket can also be used to mount it securely.
23..Reinstall the ECU Box cover.
24..Reinstall the passenger side cabin fresh air box.
25..Refill engine coolant system.
26..Run the engine and bleed the air from the cooling system according to BMW coolant system bleeding procedures.
27..Check for proper functioning of the new fan. It should turn on, cool the radiator, then turn off.
28..Enjoy your new electric fan! Thank you again for purchasing this kit!
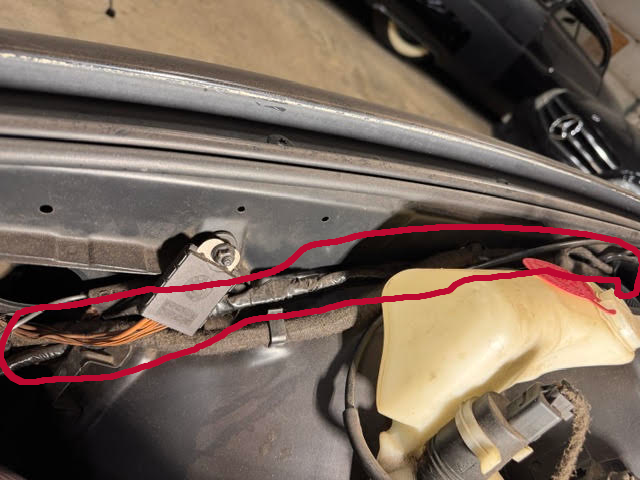
pic 7a
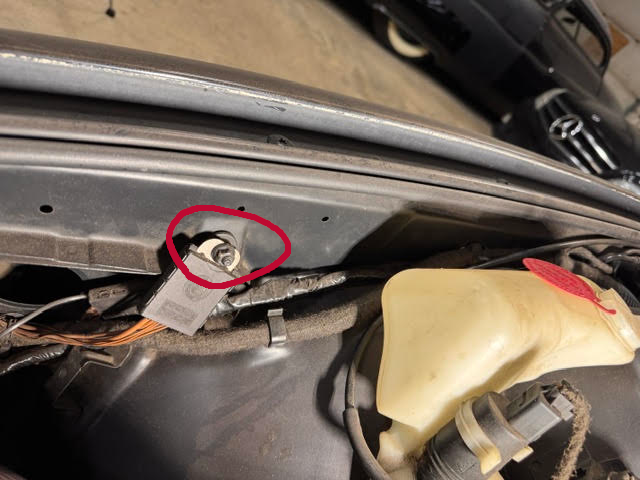
pic 7b
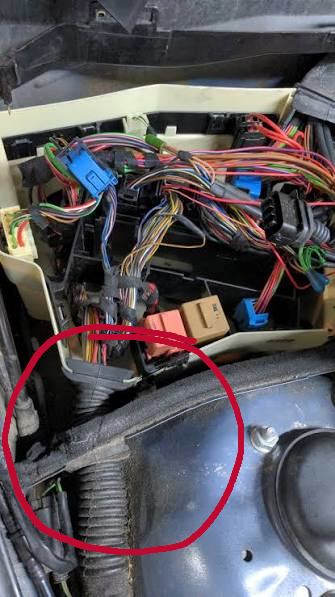
pic 8
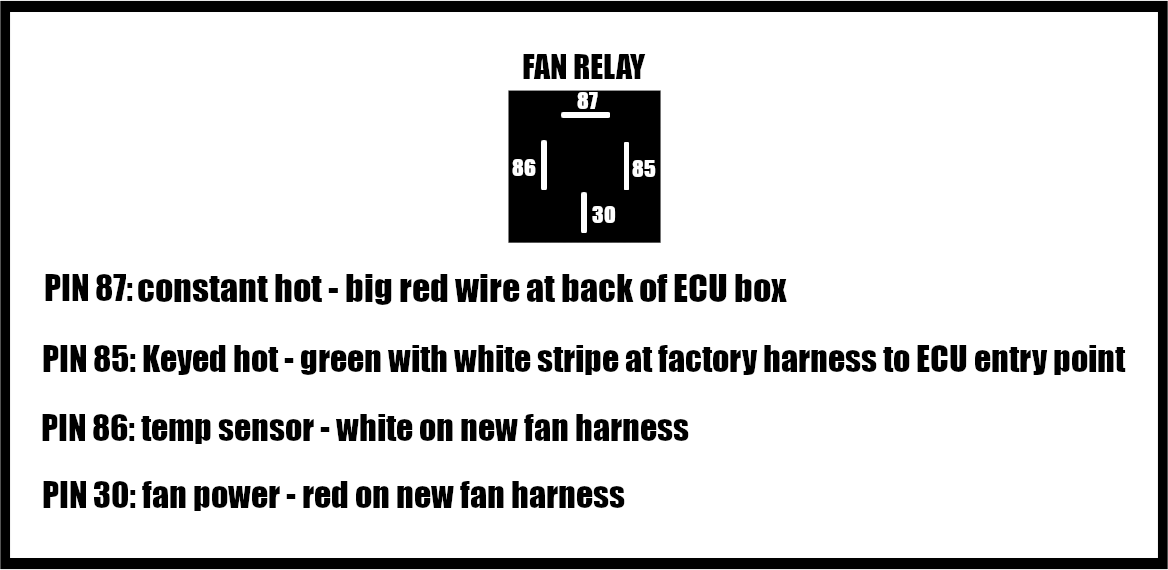
Relay pin out diagram
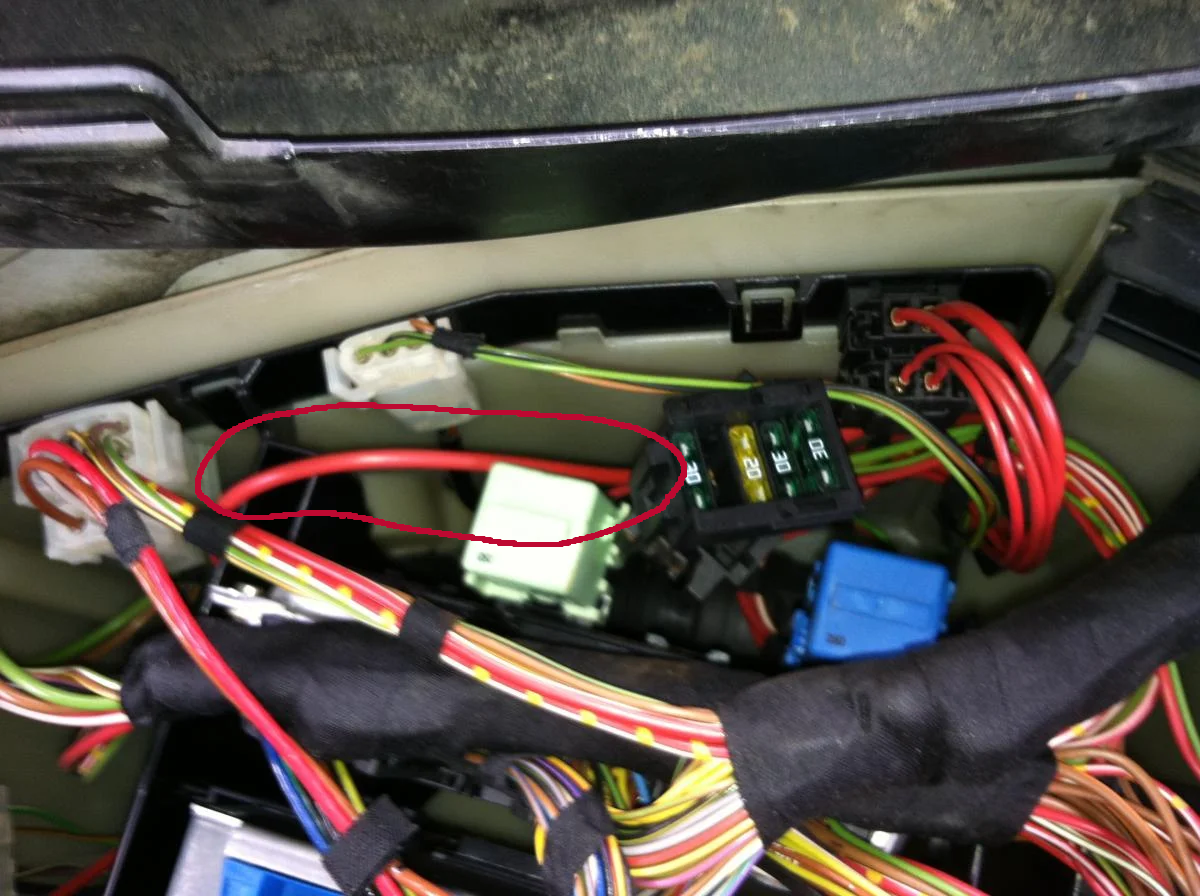
pic 9
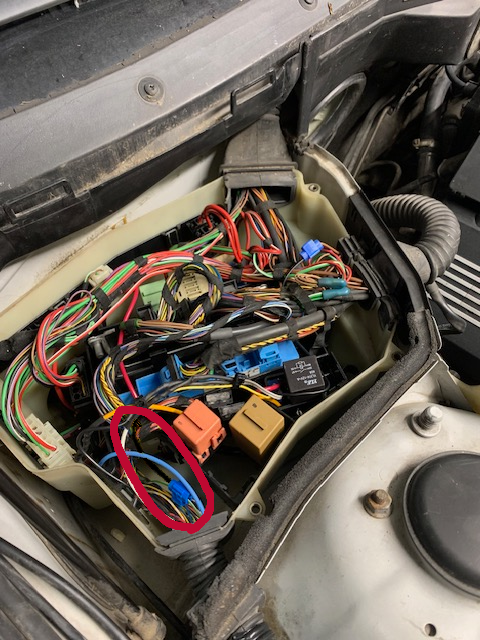
pic 10
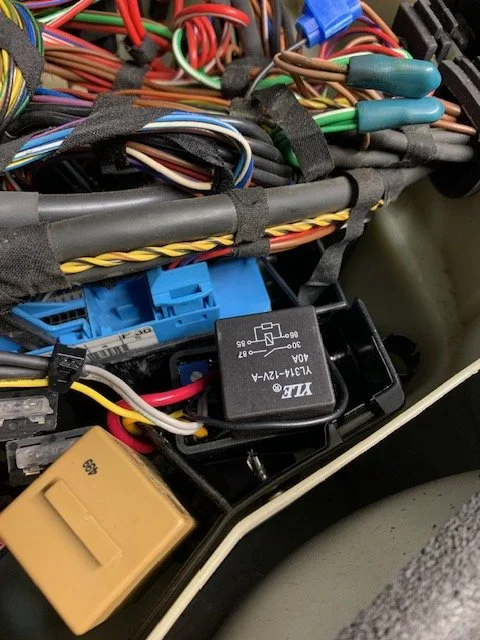
pic 11